Redsnow is easy to use, it is available for Windows and Mac OS. Pwnagetool can be used to create custom ipsw and preserve baseband, it supports Mac OS only.
Ultrasn0w doesn’t work on iOS 4.3.1 yet (even with iOS 4.3.1 + old baseband). The fix will be available soon. Here’s a warning from DevTeam for unlockers:
These are instructions on how to jailbreak and unlock youriPhone 3GS on iOS 4.1 using PwnageTool 4.1.3 for Mac OS X. This tutorial will explain how to upgrade your baseband if needed for an unlock.
There is no unthethered jailbreak for new iPhone 3GS bootroms and iOS 4.2.1 yet, so you should stay at iOS 4.1.
Important: iPhone3GS users with old bootroms who want to go to 4.2.1 and unlock should not use this PwnageTool! Update to stock 4.2.1 first, then use new redsn0w to update your baseband.
Step One
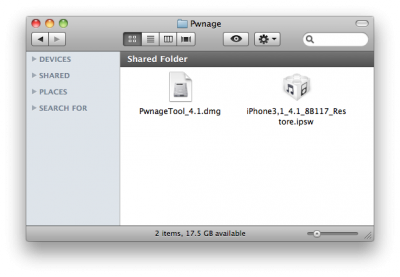
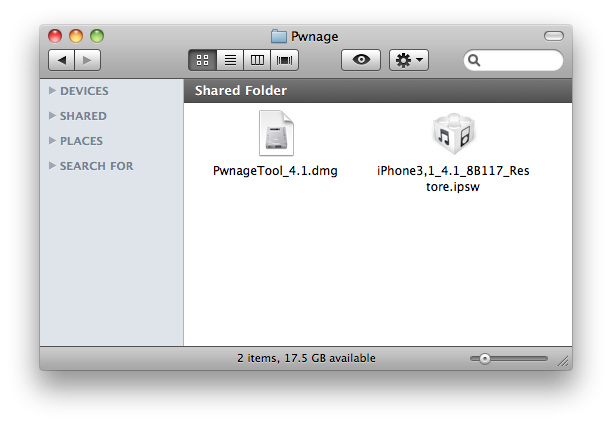
Make a folder called “Pwnage” on the desktop. Download a couple of things:
These are instructions on how to jailbreak your iPhone using PwnageTool 4.1.2 for Mac OS X. If you need unlock and you have not updated to iOS 4 you will be able to preserve baseband and unlock iPhone using ultrasn0w.
This guide will work for iPhone 4, iPhone 3GS, iPhone 3G, iPod Touch 3G, iPod Touch 4G, iPad and AppleTV. Just use the right firmware and select the right device (step four).
Step One
Make a folder called “Pwnage” on the desktop. Now you need to download there PwnageTool 4.1.2 from here and iOS 4.1 firmware from here.
When downloading the IPSW file, it is best to download it with Firefox since Safari often auto extracts it!
Step Two
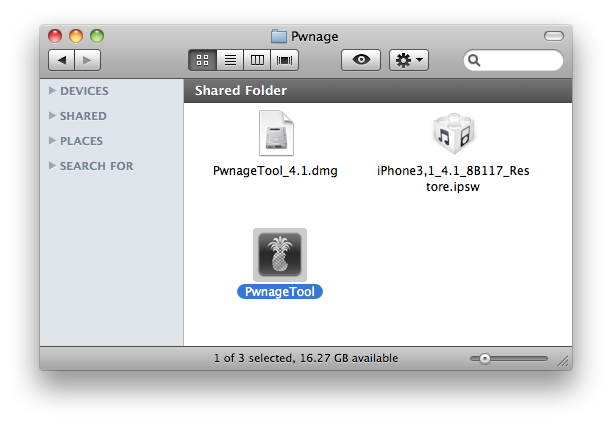
Double click to mount PwnageTool then drag the PwnageTool icon into the Pwnage folder.
Then from the Pwnage folder double click to launch the PwnageTool application.
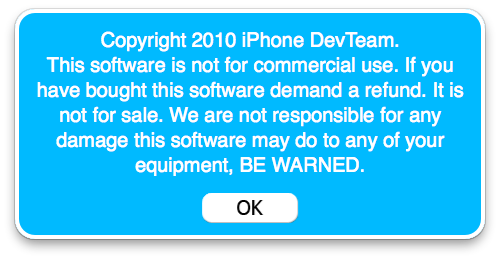
Click Ok if presented with a warning.
Step Three
Click to select Expert Mode from the top menu bar
Step Four
Click to select your device. A check-mark will appear over the image of the device. Click the blue arrow button to continue.
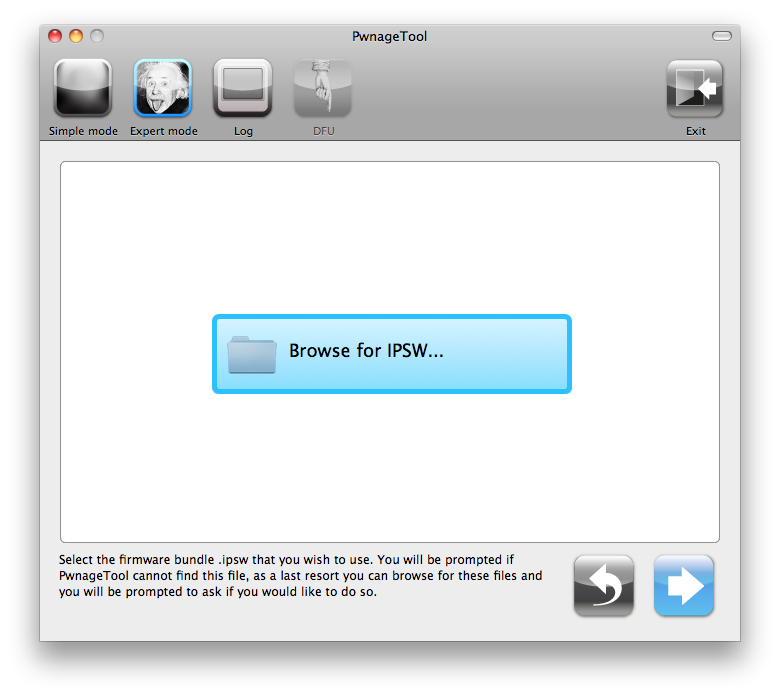
Step Five
You will be brought to the “Browse for IPSW” page. Click the Browse for IPSW… button.
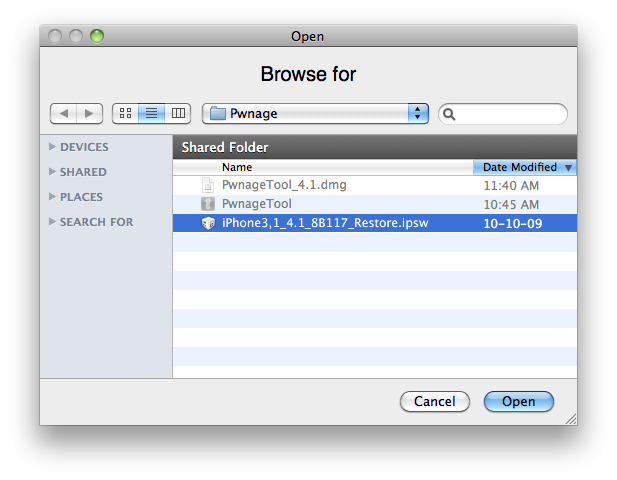
From the popup window select your firmware from the Pwnage folder then click the Open button.
Step Six
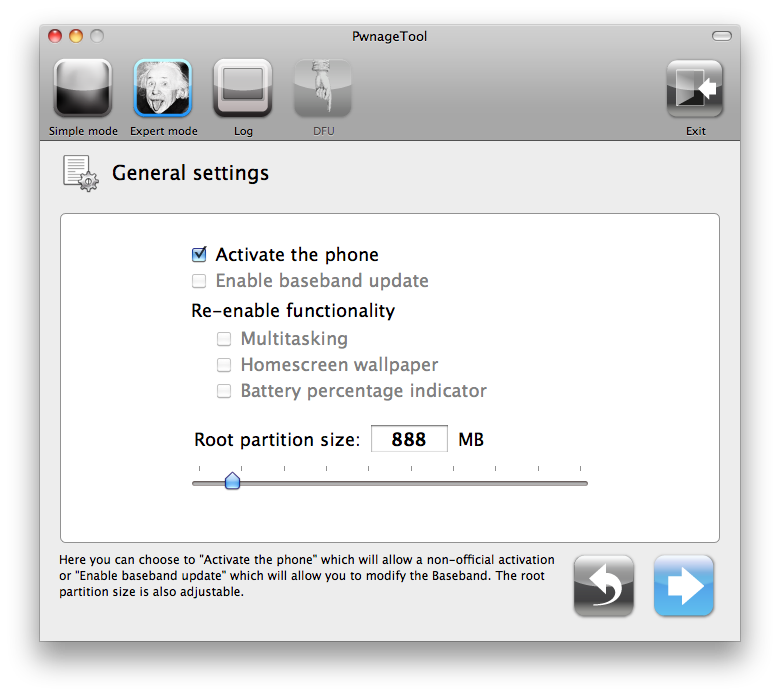
You will then be brought to a menu with several choices. Click to select General then click the blue arrow button.
The General settings allows you to decide the partition size. Check Activate the phone if you are not with an official carrier then click the blue arrow button.
NOTE*: Deselect Activate if you have an iPhone legitimately activated on an official carrier.
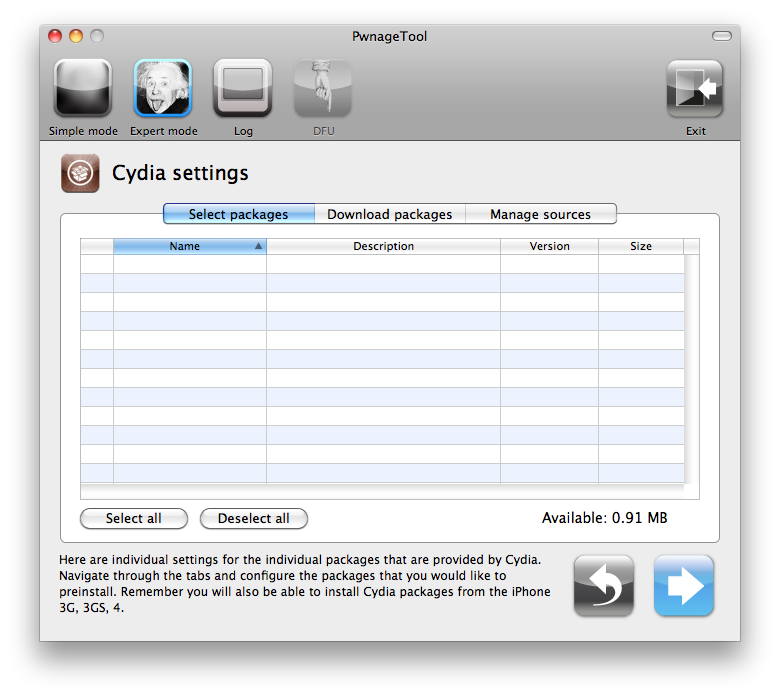
The Cydia settings menu allows you to create custom packages so you do not have to manually install the necessary them later. If you do not want to install anything here go to next step (seven).
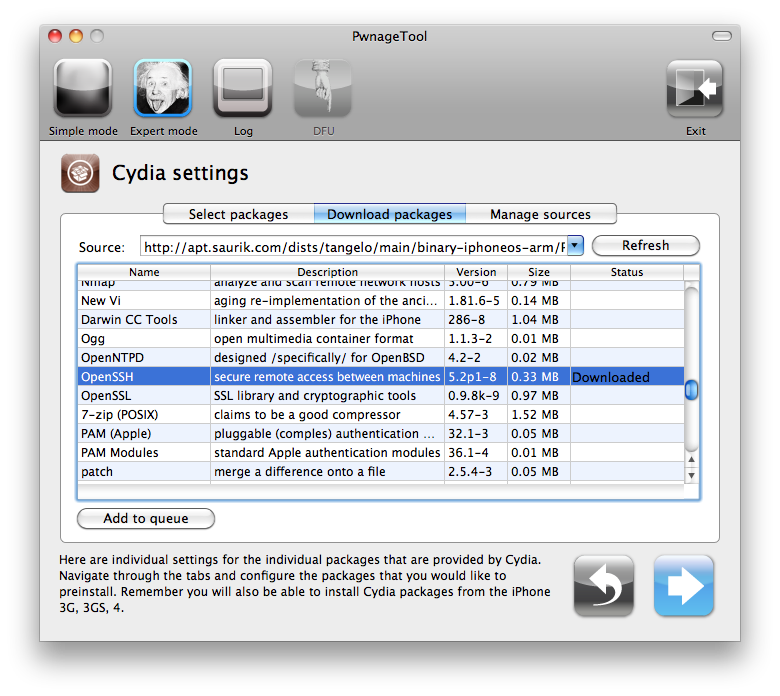
Click to select the Download packages tab. Then click the Refresh button to display all the available packages. Double clicking the package you want will download it and make it available in the Select Packages tab.
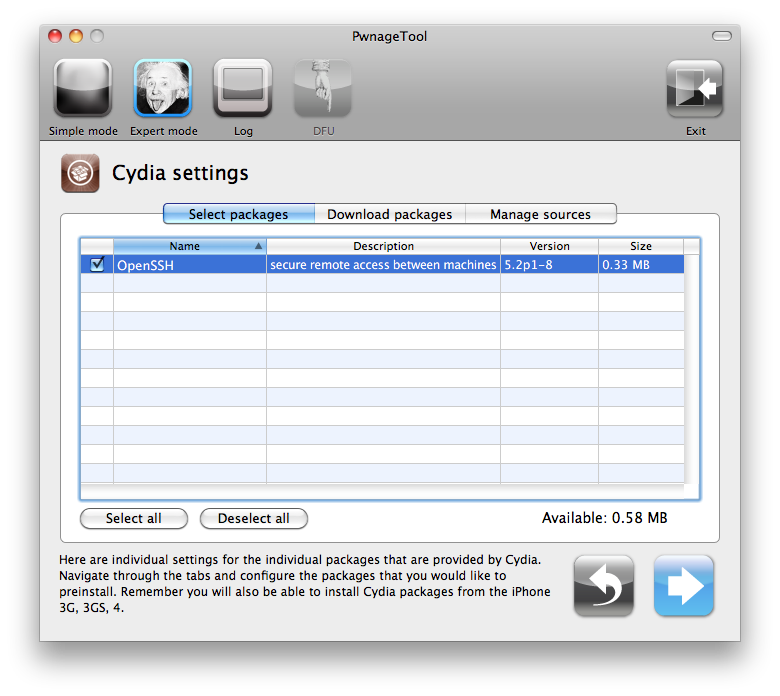
Checkmark the ones you want then click the blue arrow button.
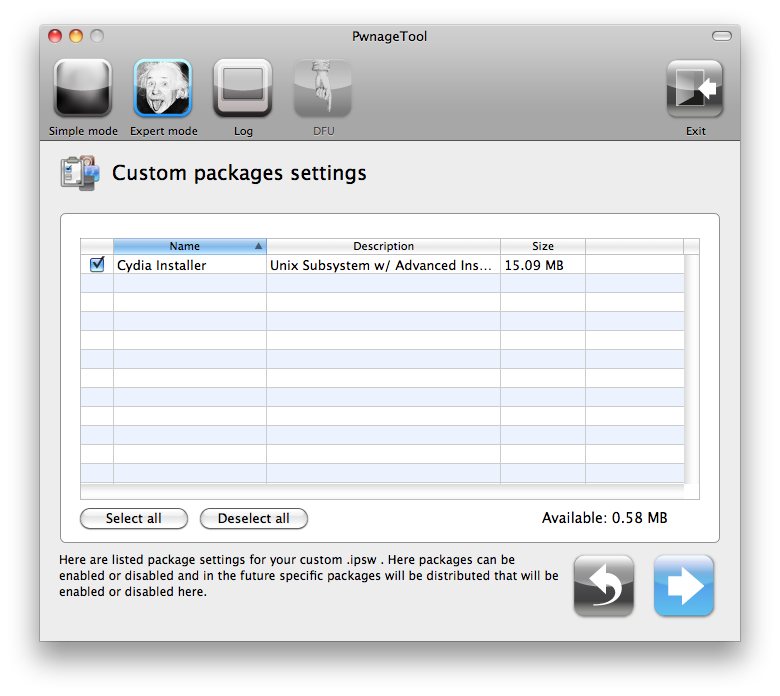
The Custom Packages Settings menu displays listed package settings for your custom IPSW. Click the blue arrow button to continue.
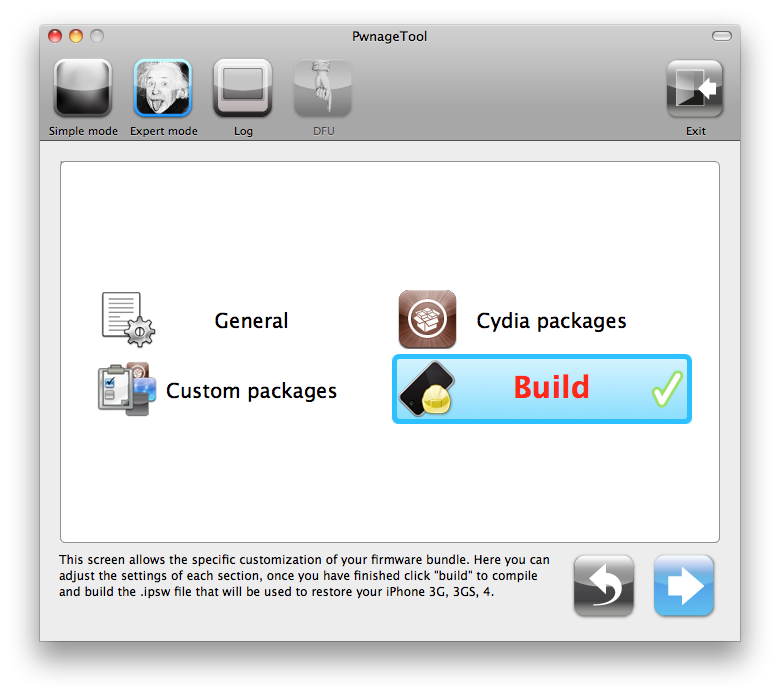
Step Seven
You are now ready to begin the pwnage process! Click the Build button to select it then click the Blue arrow button to begin.
Step Eight
You will be asked to save your custom .ipsw file. Save it to your Pwnage folder you created on your Desktop.
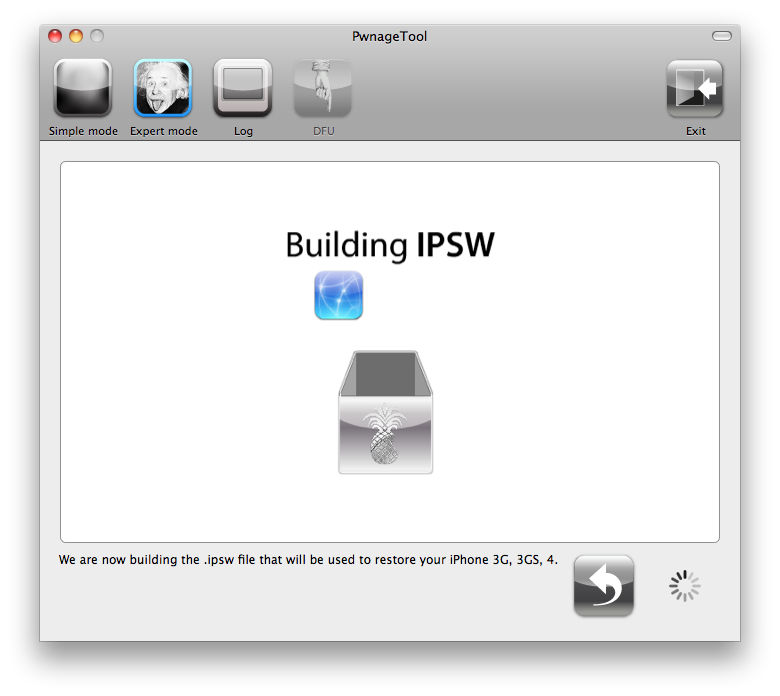
Your IPSW is now being built. Please allow up to 10 minutes.
You will be asked to enter your administrator password. Do this then click the OK button.
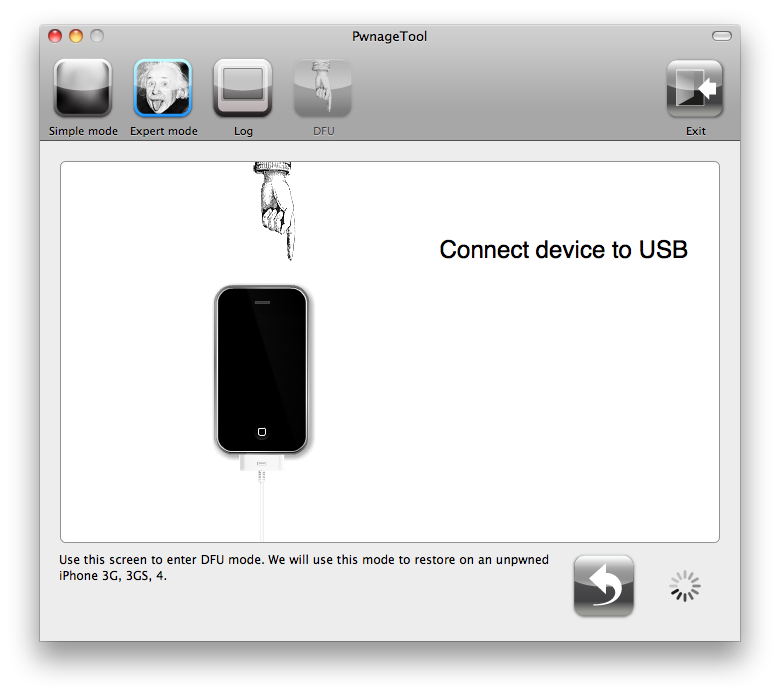
Step Nine
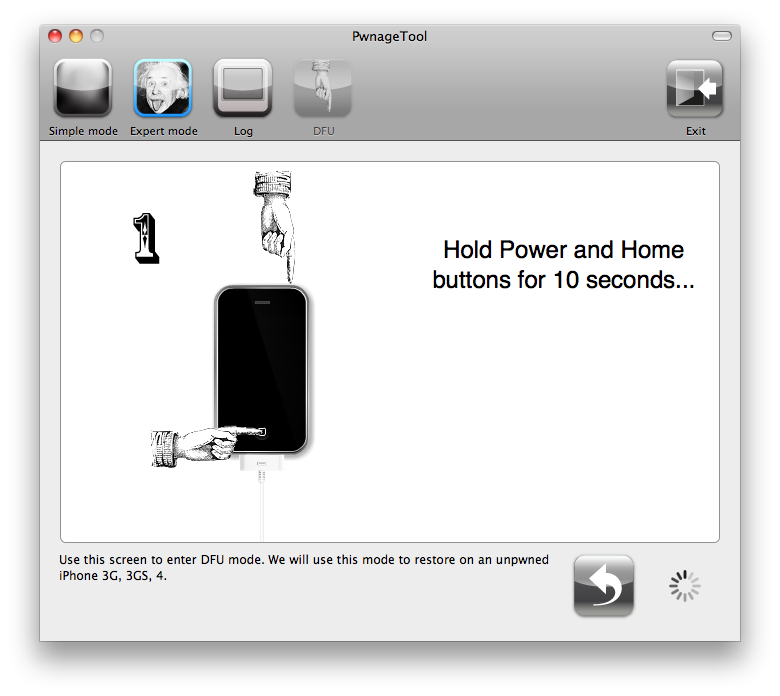
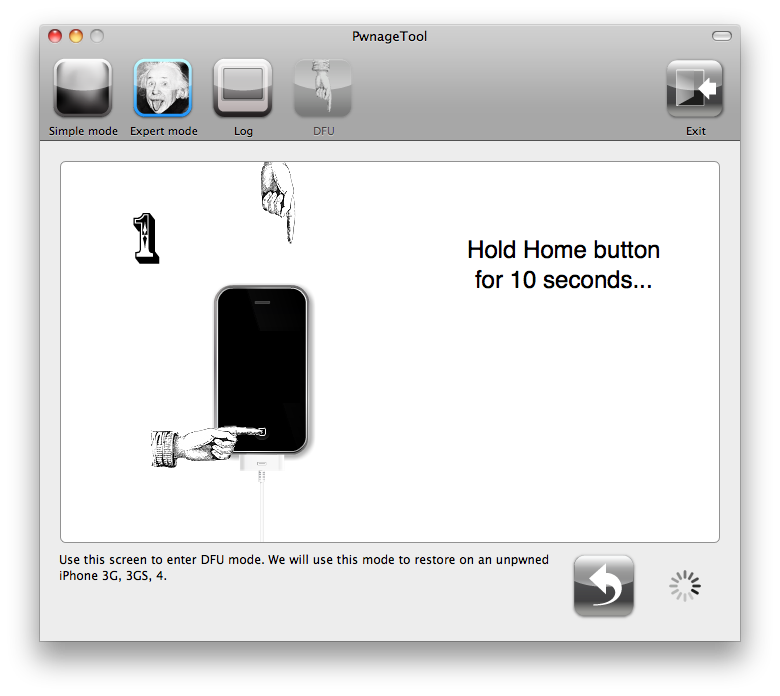
Once your ipsw has been built you will be asked to connect your iPhone to the computer. Once it detects your device PwnageTool will guide your through the steps to putting your iPhone into DFU mode.
Press and hold the power and home buttons for 10 seconds.
Then release the power button and continue holding the home button for 10 seconds.
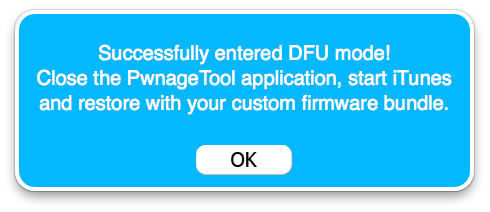
Once your iPhone is successfully in DFU mode, PwnageTool will prompt you to launch iTunes.
Step Ten
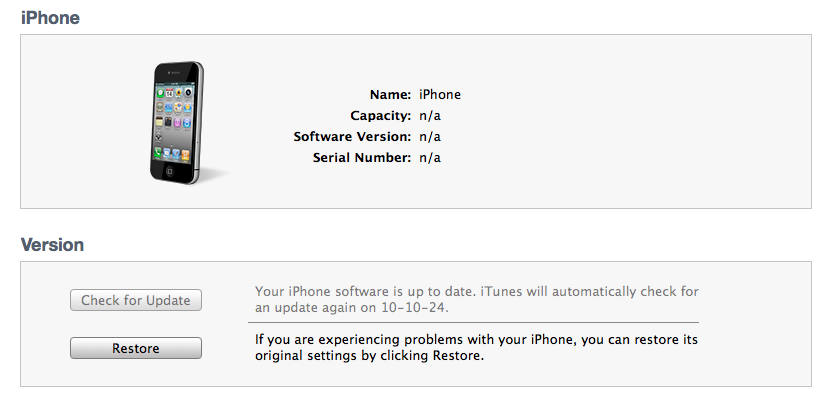
Once in iTunes, hold the Alt/Option key and click Restore.
ULTRASN0W UNLOCKERS BEWARE!! The biggest mistake you can make (and it is a big one!) is lettings iTunes restore to the official IPSW — you’ll lose the unlock and won’t be able to go back! You must use Option-Restore, not just the Restore button by itself. Then navigate to your custom IPSW — not to the stock one! If you accidentally started a restore to the official IPSW, unplug your iPhone immediately before the restore gets to the “Updating Firmware” step!
Step Eleven
Navigate to the Pwnage folder on your desktop using the dialog window that appears. Select the custom IPSW (!) that was created and click the Choose button.
Step Twelve
iTunes will now restore the firmware on your iPhone. This can also take up to 10 minutes. Once done you will be rebooted into jailbroken iOS 4.1!
Step Thirteen
When your iPhone has restarted you can run Cydia. Let it do all the necessary updates.
To have access to the root file system of your iPhone (via file managers like iFunBox or iPhone Explorer) install application called afc2add in Cydia.
Step Fourteen
If you need unlock – install ultrasn0w via Cydia, it will work if you had iOS 4.0.2 or lower before step one.
Open Cydia.
Go to Manage than click Sources.
Click Edit button in the top right corner.
Then click Add button in the top left corner.
Type http://repo666.ultrasn0w.com and click Add Source.
Now go to Search and type ultrasn0w, click on the utility and hit Install button in the top right.
RedSn0w 0.9.6 b1 for Mac OS X was released a while ago. Today DevTeam created a version for Windows users. RedSn0w 0.9.6 b1 can jailbreak iOS 4.1 and iOS 4.1 running on iPhone 3G or iPod touch 2G.
Select your stock 4.1 or 4.0 ipsw (you’ve already used this to update your device to 4.1 or 4.0)
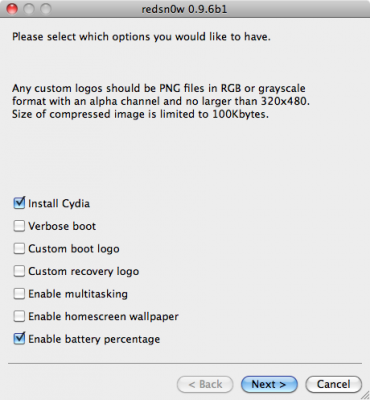
Select “Install Cydia” and any of the other options shown above, then click “Next”. Use DFU mode to install the jailbreak.
This is still beta, so there might be some problems:
Any Windows users seeing “Waiting for reboot” for too long (more than 20 seconds or so), please try “shaking” the JB process by unplugging then replugging your USB cable (while letting redsn0w continue to run). Also, try using a USB port “closer” to your computer (as opposed to on your monitor or behind another hub).
As usual DevTeam reminds us: IF YOU USE THE ULTRASN0W UNLOCK, PLEASE WAIT FOR PWNAGETOOL TO SUPPORT 4.1. DO NOT USE REDSN0W
That’s because to use redsn0w at 4.1, you need to already have updated to official 4.1 from Apple. If you do that, you lose the ultrasn0w unlock (possibly forever).
DevTeam recently released new version of redsn0w to jailbreak iOS 4.1. New RedSn0w 0.9.6 b1 supports iOS 4.0 and iOS 4.1 running on iPhone 3G or iPod touch 2G.
There is only Mac OS X x86 version, that you can download here.
Select your stock 4.1 or 4.0 ipsw (you’ve already used this to update your device to 4.1 or 4.0)
Select “Install Cydia” and any of the other options shown above, then click “Next”. Use DFU mode to install the jailbreak.
As usual DevTeam reminds us: IF YOU USE THE ULTRASN0W UNLOCK, PLEASE WAIT FOR PWNAGETOOL TO SUPPORT 4.1. DO NOT USE REDSN0W
That’s because to use redsn0w at 4.1, you need to already have updated to official 4.1 from Apple. If you do that, you lose the ultrasn0w unlock (possibly forever).

![Step-by-step Tutorial: How to Jailbreak and Unlock Your iPhone 3GS Using PwnageTool 4.1.3 (Mac OS) [iOS 4.1]](http://pwnagetool.ru/wp-content/uploads/2010/11/pwnagetool413-3gs-3-300x267.png)