These are instructions on how to jailbreak your iPhone using PwnageTool 4.1.2 for Mac OS X. If you need unlock and you have not updated to iOS 4 you will be able to preserve baseband and unlock iPhone using ultrasn0w.
This guide will work for iPhone 4, iPhone 3GS, iPhone 3G, iPod Touch 3G, iPod Touch 4G, iPad and AppleTV. Just use the right firmware and select the right device (step four).
Step One
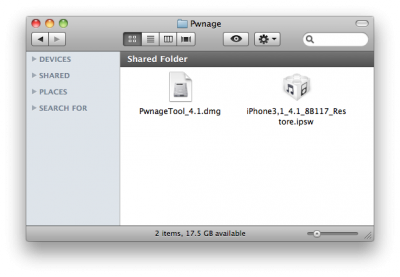
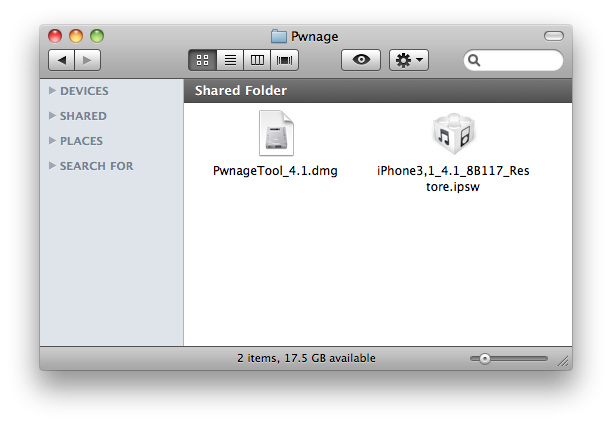
Make a folder called “Pwnage” on the desktop. Now you need to download there PwnageTool 4.1.2 from here and iOS 4.1 firmware from here.
When downloading the IPSW file, it is best to download it with Firefox since Safari often auto extracts it!
Step Two
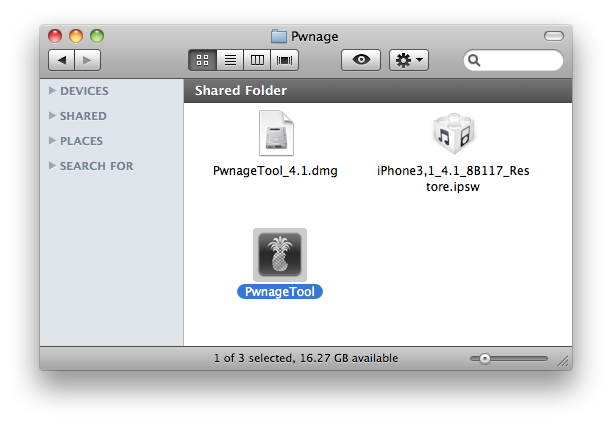
Double click to mount PwnageTool then drag the PwnageTool icon into the Pwnage folder.
Then from the Pwnage folder double click to launch the PwnageTool application.
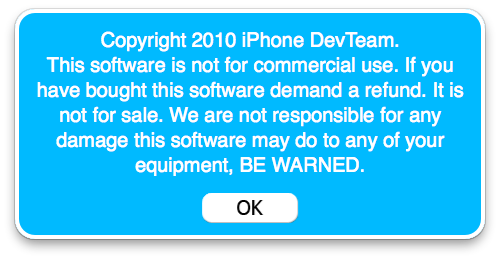
Click Ok if presented with a warning.
Step Three
Click to select Expert Mode from the top menu bar
Step Four
Click to select your device. A check-mark will appear over the image of the device. Click the blue arrow button to continue.
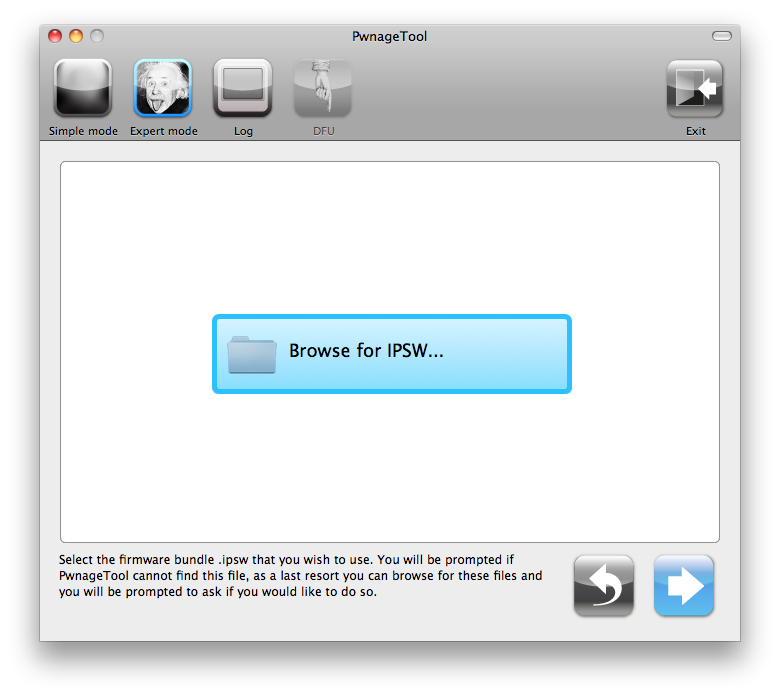
Step Five
You will be brought to the “Browse for IPSW” page. Click the Browse for IPSW… button.
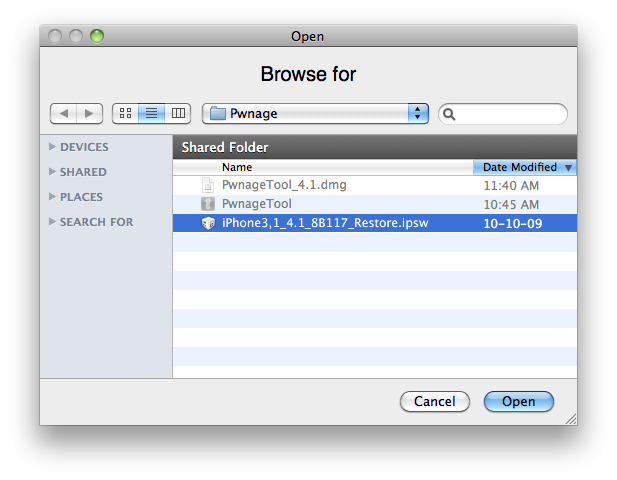
From the popup window select your firmware from the Pwnage folder then click the Open button.
Step Six
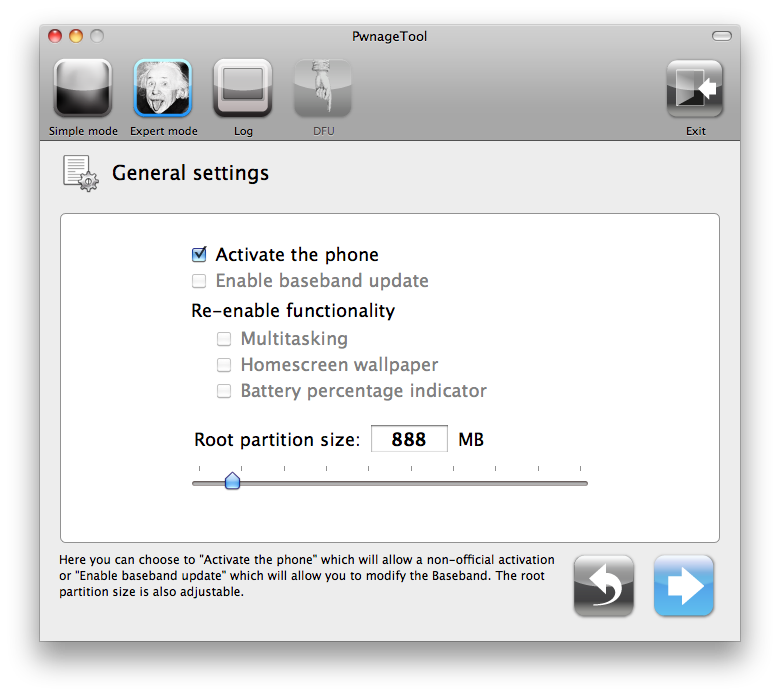
You will then be brought to a menu with several choices. Click to select General then click the blue arrow button.
The General settings allows you to decide the partition size. Check Activate the phone if you are not with an official carrier then click the blue arrow button.
NOTE*: Deselect Activate if you have an iPhone legitimately activated on an official carrier.
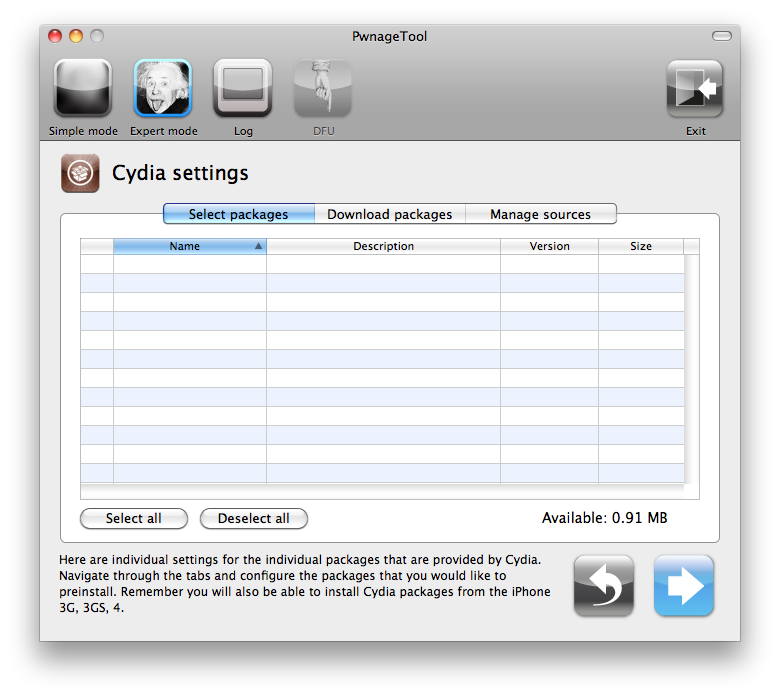
The Cydia settings menu allows you to create custom packages so you do not have to manually install the necessary them later. If you do not want to install anything here go to next step (seven).
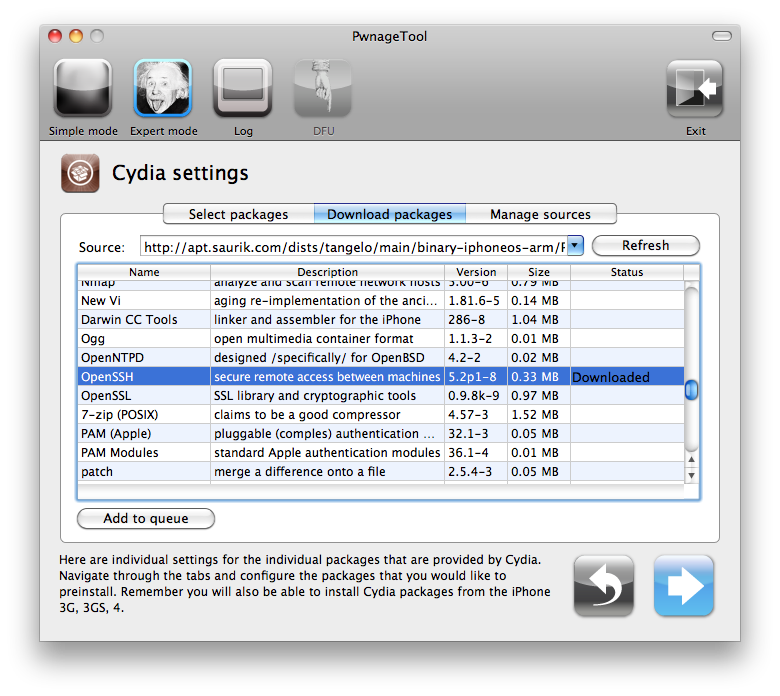
Click to select the Download packages tab. Then click the Refresh button to display all the available packages. Double clicking the package you want will download it and make it available in the Select Packages tab.
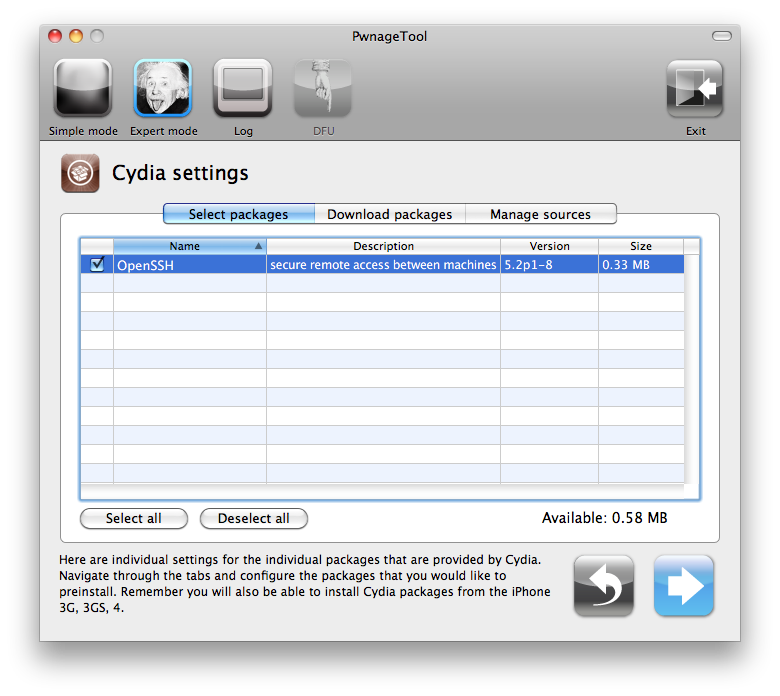
Checkmark the ones you want then click the blue arrow button.
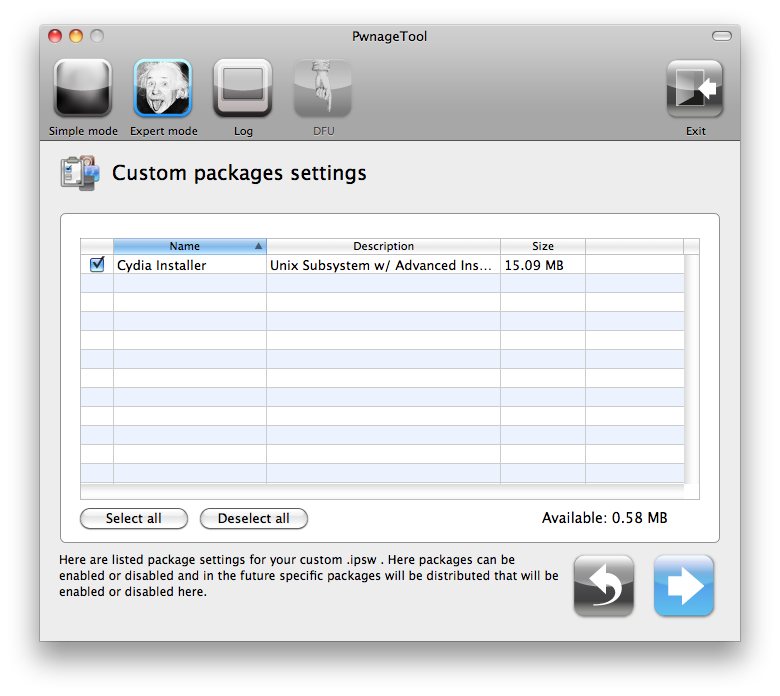
The Custom Packages Settings menu displays listed package settings for your custom IPSW. Click the blue arrow button to continue.
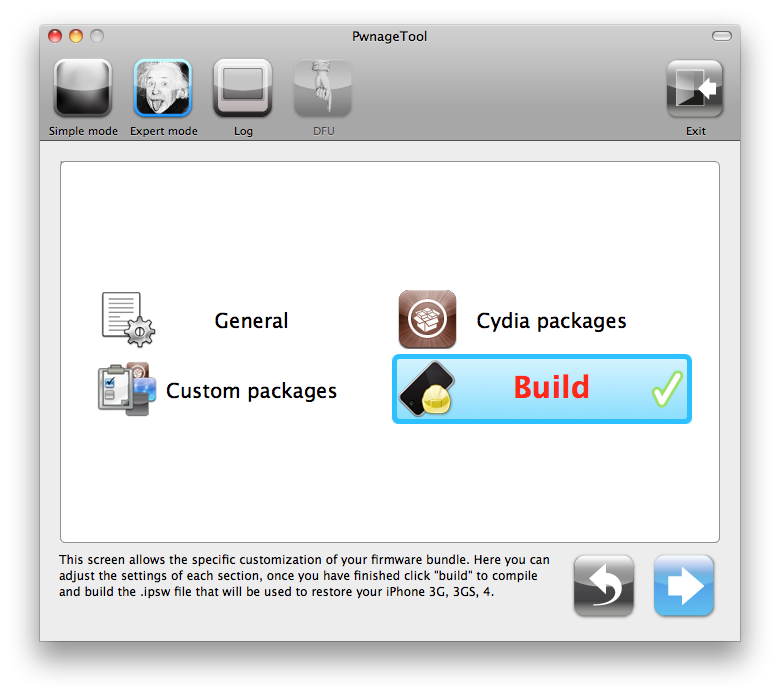
Step Seven
You are now ready to begin the pwnage process! Click the Build button to select it then click the Blue arrow button to begin.
Step Eight
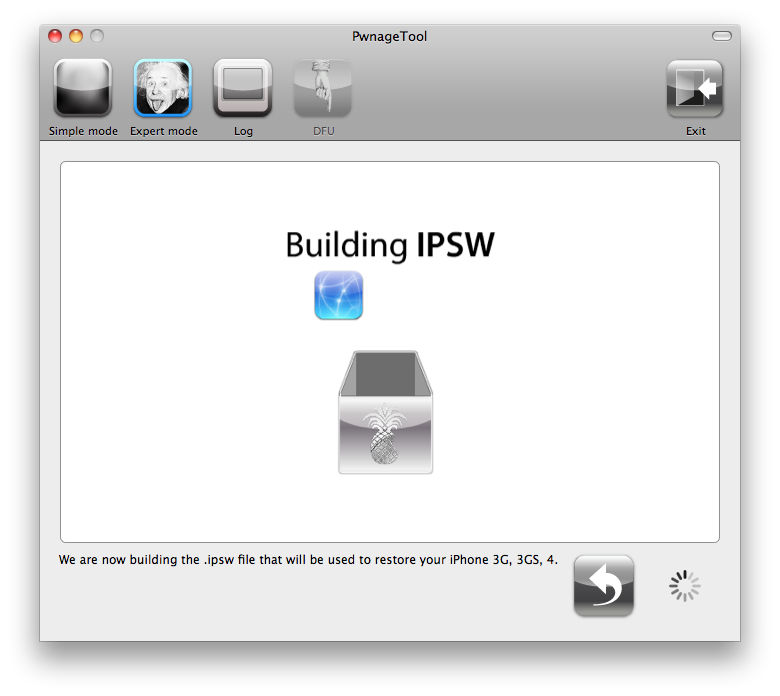
You will be asked to save your custom .ipsw file. Save it to your Pwnage folder you created on your Desktop.
Your IPSW is now being built. Please allow up to 10 minutes.
You will be asked to enter your administrator password. Do this then click the OK button.
Step Nine
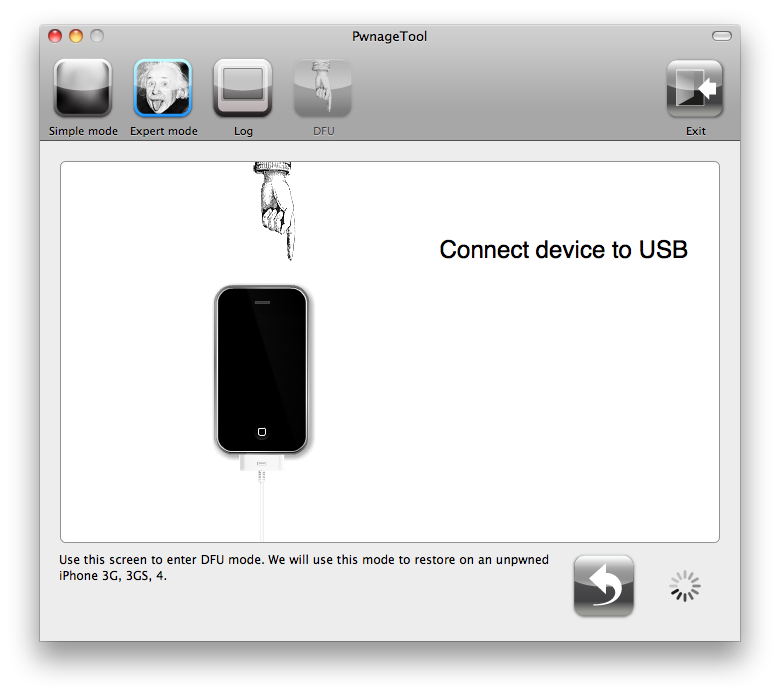
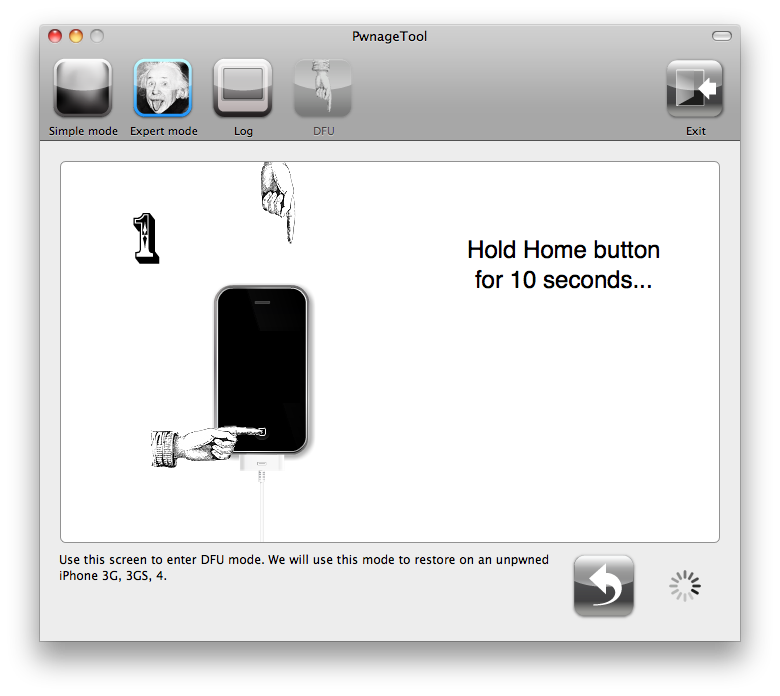
Once your ipsw has been built you will be asked to connect your iPhone to the computer. Once it detects your device PwnageTool will guide your through the steps to putting your iPhone into DFU mode.
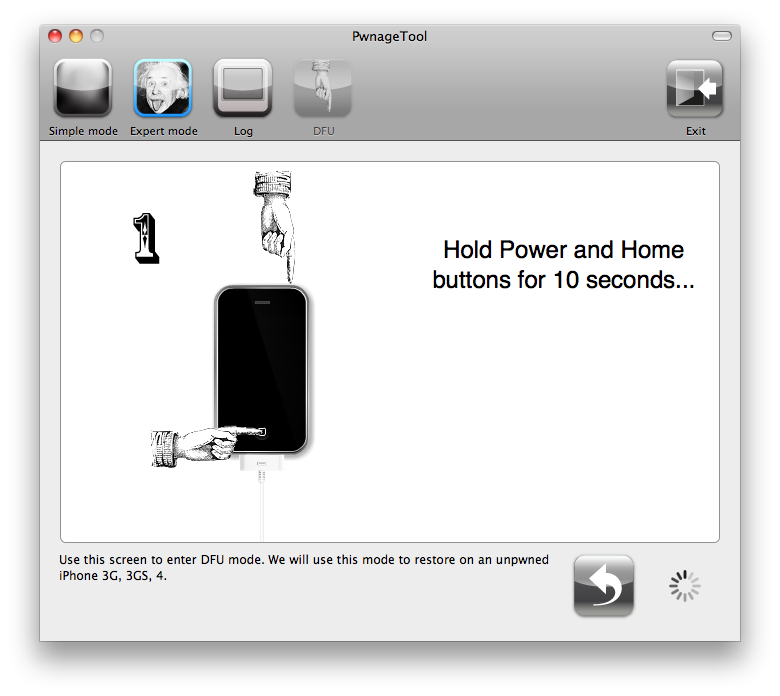
Press and hold the power and home buttons for 10 seconds.
Then release the power button and continue holding the home button for 10 seconds.
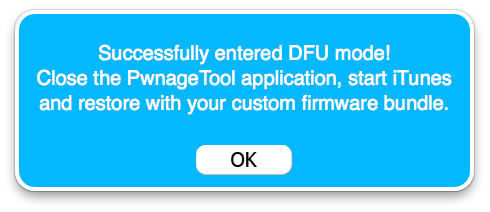
Once your iPhone is successfully in DFU mode, PwnageTool will prompt you to launch iTunes.
Step Ten
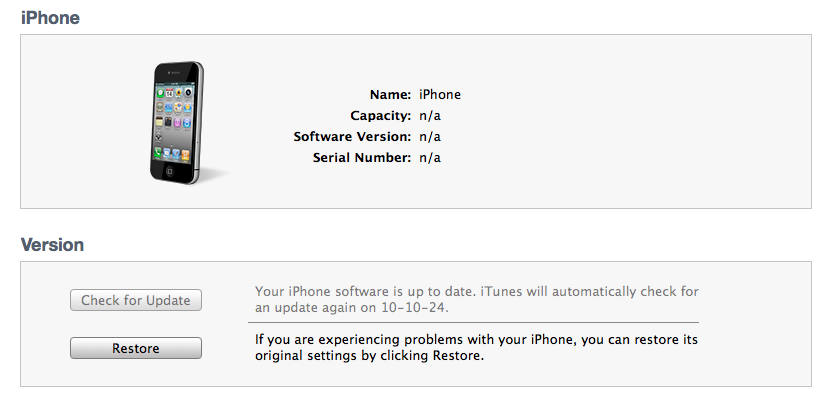
Once in iTunes, hold the Alt/Option key and click Restore.
ULTRASN0W UNLOCKERS BEWARE!! The biggest mistake you can make (and it is a big one!) is lettings iTunes restore to the official IPSW — you’ll lose the unlock and won’t be able to go back! You must use Option-Restore, not just the Restore button by itself. Then navigate to your custom IPSW — not to the stock one! If you accidentally started a restore to the official IPSW, unplug your iPhone immediately before the restore gets to the “Updating Firmware” step!
Step Eleven
Navigate to the Pwnage folder on your desktop using the dialog window that appears. Select the custom IPSW (!) that was created and click the Choose button.
Step Twelve
iTunes will now restore the firmware on your iPhone. This can also take up to 10 minutes. Once done you will be rebooted into jailbroken iOS 4.1!
Step Thirteen
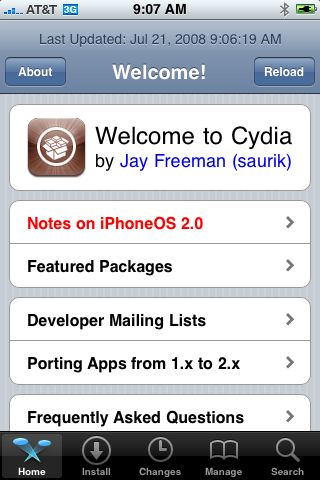
When your iPhone has restarted you can run Cydia. Let it do all the necessary updates.
To have access to the root file system of your iPhone (via file managers like iFunBox or iPhone Explorer) install application called afc2add in Cydia.
Step Fourteen
If you need unlock – install ultrasn0w via Cydia, it will work if you had iOS 4.0.2 or lower before step one.
Open Cydia.
Go to Manage than click Sources.
Click Edit button in the top right corner.
Then click Add button in the top left corner.
Type http://repo666.ultrasn0w.com and click Add Source.
Now go to Search and type ultrasn0w, click on the utility and hit Install button in the top right.
With internet tethering enabled you can use iPhone internet connection on you desktop or notebook. Here is a quick tutorial for experienced users. For everybody else – just wait for the new version of PwnageTool or some other utility.
Here it is:
A bsdiff patch to apply to CommCenter in 3.1.2 to re-enable tethering is available and . It’s just a 2-byte patch as shown below (and an appropriate readjusting of the mach-o’s codesign hash):
USE THIS AT YOUR OWN RISK! Your carrier may end up charging you for unauthorized tethering access.
Update #1 It looks like a lot of people have been looking at CommCenter lately because IRC user CleanAir had a similar tethering patch. Meanwhile over in the 2G CommCenter, WhiteRat and geniusan for that platform. Kudos to CleanAir, WhiteRat, and geniusan for digging into CommCenter and coming up with patches!
Update #2 A few have started to pop up. Eventually this will be made a part of the normal PwnageTool flow but for now this is best left for the adventurous users out there!
sub_17538+74 4B F0 58 F8 BL validate_signature
sub_17538+74
sub_17538+78 30 B1 CBZ R0, FAIL ; <— PATCH THIS TO 00 20 (MOV R0,#0)
sub_17538+78
sub_17538+7A 05 20 MOVS R0, #5 ; int
sub_17538+7C 1C 49 LDR R1, =aValidatedWirel ; “Validated wireless modem connection wit”…
sub_17538+7E 02 9A LDR R2,
sub_17538+80 7E F0 00 ED BLX _syslog
sub_17538+80
sub_17538+84
sub_17538+84 loc_175BC ; CODE XREF: sub_17538+70j
sub_17538+84 02 9C LDR R4,
sub_17538+86 05 E0 B loc_175CC
sub_17538+86
sub_17538+88 ; —————————————————————————
sub_17538+88
sub_17538+88 FAIL ; CODE XREF: sub_17538+78j
sub_17538+88 05 20 MOVS R0, #5 ; int
sub_17538+8A 1A 49 LDR R1, =aCouldNotValida ; “Could not validate wireless modem conne”…
sub_17538+8C 7E F0 FA EC BLX _syslog
sub_17538+8C
bsdiff patches are the normal way that PwnageTool modifies Apple software. To apply one manually, you must first get the “bspatch” program. Then do:
bspatch CommCenter CommCenter-hacked CommCenter.patch
If you don’t have bsdiff but know how to use a hex editor, the differences are available in text format.
The correct SHA1 of the hacked file will be:
1b19712035f33654cf72838ebe1a2033931b56b2 # 3GS
063165c3fa3e21d30eb4b486fab924ba3ef0ea5e # 3G
You would then remove the original program and replace it. Don’t forget to ensure it has execute permission!
chmod +x /System/Library/PrivateFrameworks/CoreTelephony.framework/Support/CommCenter
After you’ve started using the hacked CommCenter, visit from your iPhone and install a new mobileconfig.
Sn0wBreeze 2.9.7(supports tethered jailbreak of iOS 6.0.1 for iPhone 4, iPhone 3GS, iPod Touch 4G)
Sn0wBreeze 2.9.6(pwnagetool for windows, supports untethered jailbreak of iOS 5.1.1 for iPhone 4, iPhone 3GS, iPod Touch 3G, iPod Touch 4G, iPad and Apple TV 2G)
Sn0wBreeze 2.9.3(pwnagetool for windows, supports tethered jailbreak of iOS 5.1 for iPhone 4, iPhone 3GS, iPod Touch 3G, iPod Touch 4G, iPad; untethered for iPhone 3GS with old bootrom; untethered for iOS 5.0.1, iOS 4, iOS 3 supports Apple TV 2G)
Sn0wBreeze 2.8b11(pwnagetool for windows, supports iOS 5, iOS 5.0.1, tethered jailbreak for iPhone 4, iPhone 3GS, iPod Touch 3G, iPod Touch 4G, iPad, Apple TV 2G; untethered for iPhone 3GS with old bootrom)
UltraSn0w Current version is ultrasn0w 1.2.3, download in Cydia(unlock for iPhone 4, iPhone 3GS, iPhone 3G, firmwares 3.0-4.3.3; it supports basebands 01.59.00, 04.26.08, 05.11.07, 05.12.01, 05.13.04, 06.15.00)
Thanks to and the porting work of as well as the authors of , it is now possible to “tether” your iPhone 3G and use its Internet connection on your laptop.
Warning – Tethering your iPhone is against the iPhone data plan terms. AT&T could slap you with huge fees if you overuse this. I recommend only using it during emergencies.
Here is a basic plan (by the way, this should work for old IPhone also):
Jailbreak your iPhone 3G
Install 3Proxy and Terminal
Create an ad-hoc Wi-fi network using your laptop
Join the network with your iPhone
Find the iPhone’s IP address
Open Terminal and run the proxy program
Open Safari on your iPhone and open a web page
Configure your browser to use the proxy
Later we’ll discuss it with more details.
Step 1: Jailbreak your iPhone
Just download PWNageTool 2.0. Run it and follow the instructions. Make sure to add Cydia, when asked.
Step 2: Install 3Proxy and Terminal
During the jailbreak, Cydia should have appeared on one of your app pages: use it and let Cydia load and self-update.
Then head to Install, All Packages, then find MobileTerminal and 3Proxy (3Proxy is at the bottom). Install both and hit your Home button. Your phone will restart and you’ll see Terminal installed on your home screen. 3Proxy isn’t a GUI app and as such won’t have an icon.
Step 3: Create an ad-hoc Wifi network using your laptop
Using whatever wireless software suite you have, create an ad-hoc network. On a Mac it’s in the Airport menu, under “Create network…”. Name it something inconspicuous. I called mine “baladoux”. On your iPhone, join the ad-hoc network.
Step 4: Find your iPhone’s IP address
Then, hit the blue arrow next to it, and wait for your IP address to show up:
Memorize (or write down) this IP address. You will need it later.
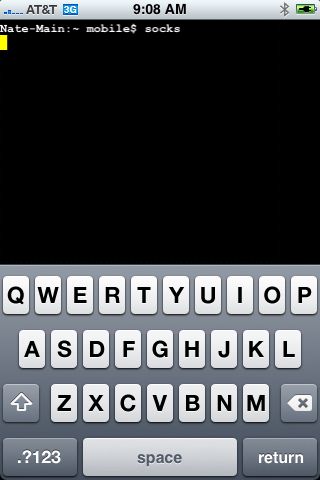
Step 5: Open Terminal and run the proxy program
Simple enough. Open Terminal, type “socks” and hit return.
Nothing will appear to happen, but the SOCKS server will be running. You can hit the home button to push Terminal to the background (remember to terminate it later, by switching back to Terminal and holding the Home button until it closes).
Step 6: Open Safari on the iPhone and open a web page
Any page will do. I recommend http://pwnagetool.ru
This step is important. The page will take a while to load. When Safari realizes it can’t get to the Internet using the ad-hoc Wifi, it will do some internal magic to switch back to 3G for Internet while still on your ad-hoc network. That lets the proxy do its thing.
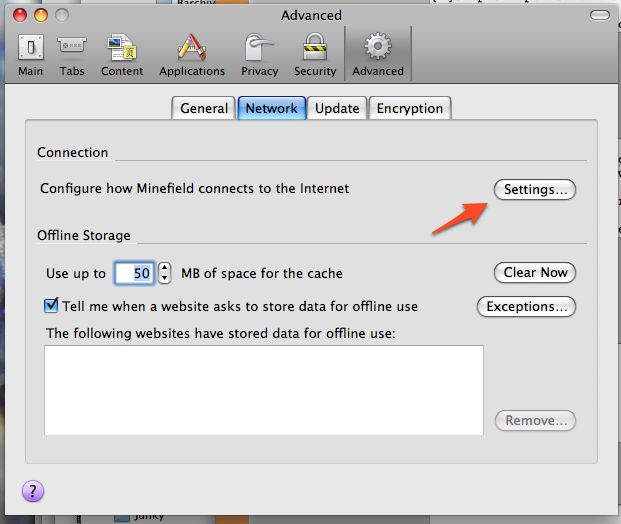
Step 7: Configure your browser
In Firefox, head to Preferences, and under Advanced, Network, hit Settings:
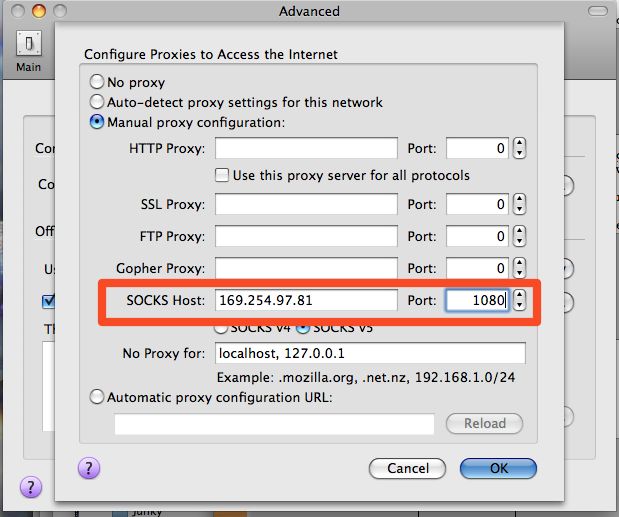
Then, fill in the iPhone’s IP address (which you memorized earlier) into the SOCKS Host field, and put 1080 as the port number. Make sure all other proxy fields are blank and/or 0 as shown:
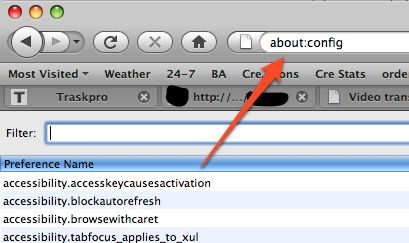
Then, since the proxy doesn’t forward DNS, you will also have to change an advanced option in Firefox. In the Firefox URL bar, enter “about:config” and hit Enter
In Filter, type “socks” and then double-click “network.proxy.socks_remote_dns” to make its value “true”.
That should be all you need! Firefox should be able to browse the Internet through your iPhone’s 3G connection.
Tethering costs a lot of battery life on the iPhone so make sure you have it plugged in. When you’re done, make sure to quit Terminal by opening it back up and pressing and holding the Home button until it quits.


